Kafka-encryption is a Java framework that eases the encryption/decryption of Kafka
record’s value at the serializer/deserializer level.
Design goals
Support or allow multiple encryption key management strategies (KMS, embedded, per message, rolling windows, per tenant, custom)
Support for Kafka Streams intermediate topics
Detect when a payload is not encrypted to skip decryption
Support for Spring Boot
Support for Camel
Customization
This framework exposes some high level Interfaces to let you customize the crypto
Serializer/Deserializer internals.
This framework is used on our platform. For obvious reason we do not reveal here our custom
implementations of these interfaces. They would probably be useless to you anyway.
However, and this is the good news, we provide in our examples some working implementations that
you can definitely leverage.
Terminology & basic explanation.
As you explore the code or the examples, you may get confused by the terminology used.
Do not confuse the Kafka record's key and the encryption key that is used to encrypt the record’s value.
You may also get confused by what we call a key name and a key reference.
A key name is in general used to lookup an encryption key in a repository, but it could also be the encryption key itself.
A key reference or key ref is derived from the key name. It can be for example an obfuscated or
encrypted version of the key name. The key ref is stored in the record’s value as a prefix of the encrypted value. .
Examples
We provide 3 examples that work out of the box. Do not use their code as is in production (we don’t).
Hopefully you can replace some of the implementations provided in the examples with your own.
TIP: When studying the samples' code, to ease your pain start by studying
the SamplesMain and SampleProducer.
Example 1 – samples/generatedkey-sample : one encryption key per record
This example uses the classic consumer API. It neither relies on the record’s key nor on an
encryption key repository. Instead the encryption key is encrypted and transmitted in the record’s value.
As a developer using the framework, in this example we provide 2 custom implementations to support our need.
These implementations are used to construct the CryptoSerializerPairFactory.
Here is roughly what this example demonstrates:
Serializer
Generates a new encryption key for each record
Encrypts the record’s value using the encryption key (see AesGcmNoPaddingCryptoAlgorithm).
Uses the master encryption key (see KeyStoreBasedMasterKey) to encrypt the encryption key. The encrypted encryption key is the key ref. Note that the master encryption key is stored in a Java KeyStore which is itself protected by a password.
Deserializer
It extracts the key ref from the record’s value.
Uses the master encryption key (see KeyStoreBasedMasterKey) to decrypt the encryption key out of the key ref.
Decrypts the record’s value using the encryption key (see AesGcmNoPaddingCryptoAlgorithm).
Example 2 – samples/kafkastreams-with-keyrepo-sample : one encryption key per record
This example uses the Kafka Streams API. It creates a KTable, its content is also encrypted.
We use one encryption key per record’s key.
The encryption key is stored in Java KeyStore, it is not transmitted in the record’s value.
As a developer using the framework, in this example we provide 4 custom implementations to support our need.
These implementations are used to construct the CryptoSerializerPairFactory.
Here is roughly what this example demonstrates:
Serializer
Uses the record’s key as the key name (see SampleKeyNameExtractor)
Using the key name, looks up the encryption key from the KeyStoreBasedKeyRepository
Uses the SampleKeyNameObfuscator provided to create the key ref by simply swapping some bytes from the key name.
It encrypts the record’s value using encryption key (see AesGcmNoPaddingCryptoAlgorithm)
Deserializer
Extracts the key ref from the record’s value
Uses the SampleKeyNameObfuscator to obtain the key name out of the key ref
Looks up the encryption key from the KeyStoreBasedKeyRepository using the key name
Decrypts the record’s value using the encryption key (see AesGcmNoPaddingCryptoAlgorithm)
Example 3 – samples/keyrepo-sample : one encryption key per record’s key.
This example uses the classic consumer API. There is one encryption key per record’s key.
The encryption key is stored in an in memory encryption key repository, it is not transmitted in
the record’s value.
As a developer using the framework, in this example we provide 4 custom implementations to support our need.
These implementations are used to construct the CryptoSerializerPairFactory.
Here is roughly what this example demonstrates:
Serializer
Uses the record’s key as the key name (see SampleKeyNameExtractor)
Using the key name, looks up the encryption key from the SampleKeyRepository, a basic in memory encryption key repository.
Uses the SampleKeyNameObfuscator provided to create the key ref by simply swapping some bytes from the key name.
It encrypts the record’s value using encryption key (see AesGcmNoPaddingCryptoAlgorithm)
Deserializer
Extracts the key ref from the record’s value
Uses the SampleKeyNameObfuscator to obtain the key name out of the key ref
Looks up the encryption key from the SampleKeyRepository using the key name
Decrypts the record’s value using the encryption key (see AesGcmNoPaddingCryptoAlgorithm)
Troubleshooting
In case the docker compose provided in the examples to run Kafka does not work for you, you may use this command:
This repository gives access to various VBA scripts that I use with Excel to improve my productivity. The scripts presented here are in .vb format, and the codes can be easily copied and applied anywhere you would want to apply them. Comments are also present in the codes to aid understanding of the codes. if you want to collaborate on a project in Excel, you can contact me on israelbssy@gmail.com.
Please, feel free to contribute to the codes any way you can. Comment any script you would like for me to provide. Cheers!
This script provides the user the option to search through a folder to check if the filenames present in a worksheet range are present in teh folder. The code can be applied as a stand-alone to keep track of a personal library, or it can also be used on a larger scale for document control in an organizational setting. The script requires the user to input the folder directory to be scanned through. A function is also present in the script that outputs a true or false. This can be used in simple cases. Click on “View” to access the code. Feel free to modify it for your personal use.
Check for worksheet existence in a workbook.(View)
When working with large files with multiple worksheets, it’s easy to lose track of a worksheet especially when all you want to do is to check if the worksheet is present in the workbook before moving on to a new workbook. This script helps the user to quickly scan through the worksheets in a given workbook to confirm the existence of a given worksheet. With this, file searching becomes way easier especially for large files. You can expand this code to achieve more, like opening the specific worksheet with just one line of code. Click on “View” to access the code. Feel free to modify it for your personal use.
Following a data import from an external source, needs might arise to reset the data, clear contents and reload a new set of data especially when working with batch data or working on a template. Analysts may find this useful when building dashboards and there is need to reload data.
Click on “View” to access the code. Feel free to modify it for your personal use.
This script gives the user the option to obtain the list if files present in a folder based on a file type. The list obtained from the code is printed on an excel worksheet already specified. This is especially useful when managing a library (large scale or personal). Beyond the management of a library,m this code can also be applied in document control when creating a master list of documents when it is not provided by default by the document management system already in place.
Click on “View” to access the code. Feel free to modify it for your personal use.
Import or copy data from an external worksheet(View)
This script gives the user the ability to import data from an external excel source. The script opens a file selection window where the source file can be selected and the data is copied to the new worksheet and pasted as values. A box is also needed for the filename to be printed to. The imported data can be used by ana analyst to perform a form of routine analysis on a template, or create dashboards when working woth batch data. A script is also provided to clear the imported data and it can be accessed here.
Click on “View” to access the code. Feel free to modify it for your personal use.
Obtain a list of all worksheets in a workbook(View)
A management technique for handling large files is provided with this script. Here, you can provide a list of all the worksheets present in a workbook. This is mostly applicable in an organizational context for reports logging and access management. The use of this script can help speed up the process of urgent reporting for multiple files.
Click on “View” to access the code. Feel free to modify it for your personal use.
Lookup data in a workbook with multiple criteria(View)
Here, a function is provided to perform lookup on data more easily than the excel builtin lookup functions. Arguments are provided in the function and they are easy to use. Use this custom function in your workbook or you can attach iit to a larger block of code as you would like to use it.
Click on “View” to access the code. Feel free to modify it for your personal use.
This script helps one to rename all the worksheets in your workbook based on cell value. When there are several worksheets in a workbook, renaming all of them one after the other could become a herculean task. However, with the extreme likelihood that there is a uniformity in the cell header or a specific defining cell common to all the worksheets, this script can easily attach names to all the worksheets bases on those defining cell values. The code block is expandable to carry more functionalities.
Click on “View” to access the code. Feel free to modify it for your personal use.
In this case, reporting and sending updates is optimized by giving a user the ability to automatically save a reporting sheet as a pdf file into a specified file location and sending an email to a specific recipient with the saved pdf file attached to the email on outlook. A use case of this script is when a routine update on a specific analysis is required by a manager or a set of staff. A window to select the folder is used in this case however, one can simply change the save folder to a constant folder path. A date cell is also advisable to have so it can be easy to track the files that have been saved. In an organizational context, a cell containing the document number can be used in place of “current date” for the filename.
Click on “View” to access the code. Feel free to modify it for your personal use.
Save all worksheets as stand-alone CSV files(View)
Still working across multiple worksheets in a workbook, a script is provided to give the user the ability to save all the worksheets available in the workbook as separate csv files. A naming convention is also provided in the script to avoid the hassle of having to manually input the names of all the files as they are saved.
Click on “View” to access the code. Feel free to modify it for your personal use.
Save all worksheets as stand-alone XLSX files(View)
Still working across multiple worksheets in a workbook, a script is provided to give the user the ability to save all the worksheets available in the workbook as separate csv files. A naming convention is also provided in the script to avoid the hassle of having to manually input the names of all the files as they are saved.
Click on “View” to access the code. Feel free to modify it for your personal use.
With this script, one can quickly save a file in any specified file format/extension by the click of a button or an assigned shortcut. This script, though simple, has many applications including when building userforms or building dashboards in excel. This can also be extended to other Microsoft Apps that support VBA.
Click on “View” to access the code. Feel free to modify it for your personal use.
When working with dashboards, it is sometimes desirable to view the worksheet in fulll screen format to reduce distractions and provide real estate for analysis. Two sub-routines are provided here that help the user to toggle full screen in excel. With this, presentations using excel becomes way easier and more space is provided for analysis elements.
Click on “View” to access the code. Feel free to modify it for your personal use.
You can upload files in excel or upload files when working with a userform. This script can be attached to other functionalities in excel to achieve tasks that involve interacting with other files. The script opens a folder directory and the file types that are accessible by the user can be defined in the script.
Click on “View” to access the code. Feel free to modify it for your personal use.
When working with live data, it might not always be very convenient to do so with MS Excel. For this, you would need to upload your data to a database so a direct query of your data can be performed using any analysis tool. This script creates a connection with a/an SQL Server database, and following an event trigger, the data is uploaded or added to the database on connected table/tables. You can also write simple SQL quaries on your data in the VB- Environment. This is especially useful when working with DirectQuery in Power BI. Click on “View” to access the code. Feel free to modify it for your personal use.
Xceed is excited to introduce its new Toolkit for MAUI!
We’re thrilled to introduce our new Toolkit for MAUI, an open-source and free version that includes additional controls and features to supplement the existing “basic controls”. Our goal is to provide developers with the tools they need to create exceptional user experiences.
Our toolkit is designed with developers in mind, and we’ve taken care to make it as user-friendly and intuitive as possible. Whether you’re an experienced developer or just getting started, you’ll find that our controls and features are easy to use and integrate seamlessly into your projects.
With MAUI’s cross-platform capabilities, you can develop applications that work seamlessly on Windows, Android, Mac, and iOS, without the need for separate code bases. We’re committed to ensuring that our toolkit is compatible with all MAUI-supported platforms and that the experience is identical across all of them.
For those familiar with WPF, this toolkit will feel familiar, and we’ve made every effort to create a seamless transition for you. Our goal is to provide a comfortable and intuitive experience, making it easy to get started and get productive quickly.
Currently, the toolkit includes a range of controls, with more to come in the future. These controls include an improved Border, Button, RepeatButton, ButtonSpinner, a series of NumericUpDown, ToggleButton, ContentControl, Card control, all these controls includes 48 accent colors for each control. We’re committed to continually improving and updating the toolkit to meet the evolving needs of developers.
Thank you for considering Xceed’s Toolkit for MAUI. We’re excited to see what you create with it! Meanwhile, here’s more information on the controls we provide:
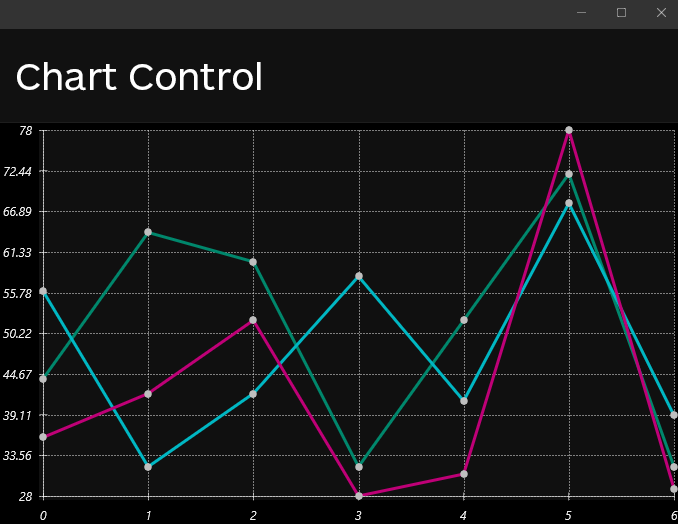
Chart
Our Chart Control allows you to build simple and beautiful charts with very little effort. You can customize the following elements :
Choose dates effortlessly with a control similar to the WPF, which allows selection by month, year, or decade. It supports specifying SelectedDates and BlackoutDates, providing flexibility in choosing single dates, ranges, or multiple ranges to meet your scheduling needs.
A control allows for displaying any View on top of everything else, offering both modal and non-modal popup options. The latter closes with a click outside. You can position the popup in various locations: TopLeft, Top, TopRight, Right, BottomRight, Bottom, BottomLeft, or Left, relative to the Window, the popup’s parent, or an Anchor View object. The IsOpen property is used to open or close the popup, with Open()/Close() methods available for straightforward operation. Additionally, Opened and Closed events are provided for effective application integration.
DropDownButton
A control designed for click interaction, opening a popup that can contain any View. It automatically closes when clicking outside the popup. The location of the popup can be customized to appear on any corner or side of the DropDownButton, with the option to set a maximum popup height. It includes Opened and Closed events for easy tracking of the popup’s state.
DateTimeUpDown
A control similar to the NumericUpDown, but designed for adjusting date portions with Up/Down actions. Keyboard left and right navigation enables shifting between different date segments, enhancing the user’s interaction and efficiency in date selection. You can also adjust the Date Format to be any of the predefined formats or use a custom one.
AutoCompleteTextBox
A control, derived from our TextBox (retaining all its properties), enables the provision of an ItemsSource and a FilterType to display a popup that filters data based on current input. It supports filtering methods such as Contains, StartsWith, Equals, and more. An ItemTemplate property allows for customized display of popup elements according to your preferences.
Calculator
A control designed to display a calculator complete with buttons for performing calculations. All buttons are stylizable, and the precision of decimal calculations can be adjusted to meet specific requirements.
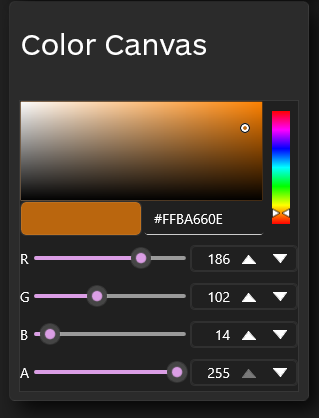
ColorCanvas
The ColorCanvas control facilitates intuitive color selection in applications. It offers a simple graphical interface with including ColorSpectrum for seamless color picking.
TextBox
The TextBox control is a versatile input element offering advanced features not available in the basic controls in MAUI. Including :
Underline Removal: Option to remove underlines typically associated with standard text input controls.
Corner Radius Customization: Ability to set corner radius for rounded or customized corners, enhancing visual appeal.
Border Customization: Modify border properties, including thickness and color, to suit application design.
Non-proportional ClearButton: A ClearButton that does not follow proportional sizing, providing design flexibility.
Custom Watermark: Support for diverse watermark types instead of just strings, offering a more dynamic UI.
ClearButton Styling: Ability to style the ClearButton to match the overall design of the application.
MaskedTextBox
The MaskedTextBox allows you to use the same functionalities that you find in the textbox while adding support for a mask, here’s a few examples of mask you can use and how they look like:
<xctk:FilePickerWatermark="File Picker" />
And you will then have access to a selectedfile(s) property. The control supports both single or multiple files selection.
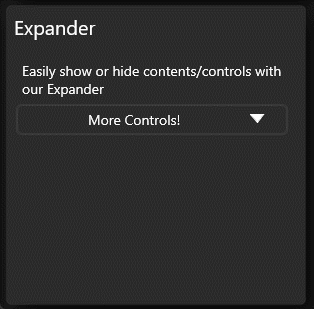
Expander
The Expander is a versatile control designed to improve the user interface by enabling the expansion and collapse of content in either a downward or upward direction. It provides a clean and intuitive way to manage and display additional information, enhancing user experience and interface organization. Users can easily expand to view more details or collapse to save space, offering flexibility in how information is presented within the application.
To use, simply set the content property on the control to what you wish, you can use the header property to change the button’s caption.
CheckBox
The CheckBox is an enhanced version of the standard CheckBox control, providing additional features and flexibility. Key features include:
Tri-State Functionality: Supports three states – true, false, or indeterminate, offering more options for representing data.
Customizable Size and Appearance: Allows customization of size, box style, border, corner radius, and padding, providing design flexibility.
Content Support: Allows inclusion of content within the CheckBox, enabling a more informative and interactive user interface.
Custom Symbols: Enables customization of symbols for checked, indeterminate, and unchecked states, allowing for a personalized look and feel.
These features enhance the usability and visual customization of the Xceed CheckBox, making it a valuable component for building interactive UIs.
RadioButton
Just like the CheckBox control, the RadioButton is an enhanced version of the standard RadioButton control, providing additional features and flexibility.
One of the issues we have with the basic border control offered in MAUI is the lack of having independent corner radius as an example, we fixed that, here’s a list of additional features:
A BorderBrush property of type Brush, instead of Stroke of type Brush.
A BorderThickness property of type Thickness, instead of StrokeThickness of type double (for
independent borders).
A CornerRadius property of type CornerRadius (for rounded corners).
The Content’s Labels benefit from the FontSize, FontAttributes, FontFamily, and TextColor properties.
Here’s an example on how to set earch CornerRadius independantly
<xctk:BorderCornerRadius="40,0,40,0" />
Button
The default .NET MAUI Framework Button did not include some essential features such as MouseOver and pressed styles (as shown in the screenshot above), and did not allow for the addition of custom content, such as images layouted in particular ways. We have addressed these limitations with our custom Button implementation, which includes the following features:
BorderBrush (type Brush) for more flexibility than BorderColor of type Color.
BorderThickness (type Thickness) to allow for independent borders rather than BorderWidth of type double.
ClickMode to trigger the Clicked event on a Press or Release.
Content (type object) to display the user’s View or a Label if they pass a string.
CornerRadius (type CornerRadius) for independently rounded corners rather than int.
HorizontalContentAlignment (type LayoutOptions) to align content horizontally.
VerticalContentAlignment (type LayoutOptions) to align content vertically.
ContentTemplate (from ContentControl) to configure the content.
Labels in Content can use properties such as FontSize, FontAttributes, FontFamily, and TextColor.
PointerOver and PointerPressed.
Note: The BorderColor property has been removed as Background already exists.
With our custom Button implementation, you can create highly flexible and customizable buttons for your .NET MAUI apps.
ToggleButton
MAUI currently does not include the ToggleButton control. Therefore, we have created one that has the same functionalities as our button. However, we added a simple yet useful feature to the ToggleButton: a “IsChecked” property that gives the button a “pressed” appearance. We believe that this feature can be helpful for users who are familiar with this control. Moreover, implementing this feature was not complicated, and it enhances the overall user experience of our library.
RepeatButton
We have created a new control called RepeatButton, which is derived from the Xceed Button. This control includes the Delay and Interval properties, which allow the Clicked event to be raised more than once.
The RepeatButton control is similar to a standard button, but it provides the additional functionality of allowing the Clicked event to be raised repeatedly while the button is pressed. The Delay and Interval properties control the amount of time before the first repeated Clicked event is raised, and the frequency of subsequent events, respectively.
With the RepeatButton control, you can create more responsive and interactive user interfaces in your .NET MAUI apps.
NumericUpDown
Using our very own ButtonSpinner, we offer a series of brebuilt control for you to use, these controls includes:
ByteUpDown
DecimalUpDown
DoubleUpDown
IntegerUpDown
LongUpDown
SByteUpDown (integers with values ranging from negative 128 to positive 127)
ShortUpDown
SingleUpDown (for float)
UIntegerUpDown (unsigned integer in the range of 0 to 4,294,967,295)
ULongUpDown (unsigned integer in the range of 0 to 18,446,744,073,709,551,615)
UShortUpDown (unsigned integer value between the range of 0 to 65,535)
These controls should make our users lives easier when dealing with different datatype.
ContentControl
We have created a new control called ContentControl, which allows you to set the content and its associated DataTemplate.
The ContentControl is a versatile control that can display any type of content, including text, images, and other controls. By setting the Content property, you can specify the content to be displayed, and by setting the ContentTemplate property, you can specify how the content should be displayed.
The DataTemplate allows you to define a layout for the content, including styles and formatting. By using the ContentControl in conjunction with DataTemplates, you can create highly customized and dynamic user interfaces in your .NET MAUI apps.
ButtonSpinner
We have created a new control called ButtonSpinner, which is derived from the ContentControl. This control allows you to display content along with two RepeatButtons (Spinners) and includes several useful properties and events.
The ButtonSpinner control includes the following properties:
AllowSpin: controls whether the Spinners are allowed to raise events.
SpinnerDownContentTemplate and SpinnerUpContentTemplate: specify the DataTemplates for the Spinners.
SpinnerLocation: determines the location of the Spinners (either left or right of the content).
ValidSpinDirection: specifies the allowed spin direction (either up or down).
In addition to these properties, the ButtonSpinner control raises a Spin event when the RepeatButtons are clicked or held down. This event can be used to respond to user input and update the content as needed.
With the ButtonSpinner control, you can create highly interactive and customizable UI components in your .NET MAUI apps.
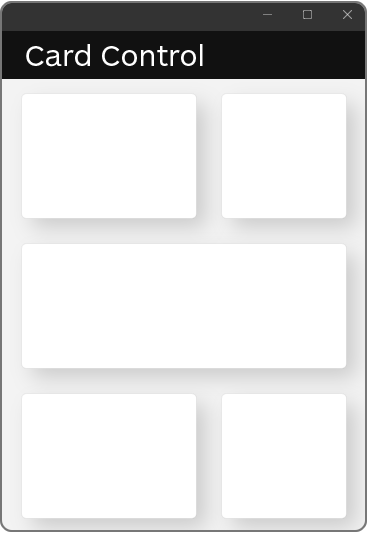
Card
We have created a new control called the Card Control, which provides a visually appealing way to display content in your .NET MAUI apps.
The Card Control is a frame with a subtle shadow effect, which creates the illusion of depth and makes the content stand out from the background. This makes it an ideal choice for displaying important information or creating a visually striking user interface.
With the Card Control, you can easily add depth and visual interest to your .NET MAUI apps without the need for complex styling or layout. Simply add the control to your XAML code and specify the content to be displayed within it.
Getting Started
The first thing you will want to do is get the package on NuGet or simply clone the project and add it to your references.
Once this is done, you will need to add a reference to the Xceed namespace :
Keep in mind that for this example we are using Pink. However, we offer a total of 48 different accent colors, each with its own variations. To see the complete list, you can type AccentColor=”” to access the enumeration.
You can also add the following line in your Application declaration :
UserAppTheme="Dark"
This can also be done through code:
Application.Current.UserAppTheme=AppTheme.Dark;
If you wish to offer your users to switch between Light and Dark, you can use this line of code:
Once you have added the code above, you are ready to start using Xceed Toolkit for .NET MAUI!
One thing you can try, that is not available by default in .NET MAUI, is adding Content to a button. If you are used to WPF, this will look very similar with what you would have done on that platform :
Of course, you will need to provide your own image. If for some reason, none of the controls show up on your app, most likely this is due to not having added the theme to your application :